Saturday, 29 May 2010

Paint Job Done.

I picked up the MH today from the paint shop.  Here's the finished thing.  These are not my photos they are Jerry's.  I didn't have time today to pose it as I did before it went away so consider these just a sneak preview.  I am away on my narrowboat for the week so it won't be till next weekend, but I just had to share.  You will agree Jerry has done a great job.


I am so pleased with the finished job.  Who would guess this was once an ambulance?

Still a few external enhancements to come.  Wheel trims and some decals and sign writing are next on the list, and my wife wants some bee graphics as well
Anyone care to guess what we are going to call it?


Thursday, 27 May 2010

More Pics From The Spray Shop

A quick photo update.

Masking out the swirls

Swirls sprayed

Masked up ready for the white paint

Friday, 21 May 2010

Red Paint

I got some more photos from Jerry at the paint shop.

Still a bit more to do, but already looking good.

Saturday, 15 May 2010

Sliver Paint

Here's the latest from Jerry at the paint shop.  The sliver coat has been put on.


Thursday, 13 May 2010

Latest Updates From The Spray Shop

I got a few pictures today by phone from the spray shop, so I thought I'd share.

Earlier in the week

Today 7.5L of primer used


Tuesday, 4 May 2010

Off To The Spray Shop

The MH went to the spray shop today.  This is what it looked like.


Watch this space.

Monday, 26 April 2010

Inside Now Outside

I made the box to cover the high pressure gas fittings and lines.  The inside of the box was sealed with mastic and on the bottom the bottom rim I used a closed cell foam tape to form the seal to the floor.  So now the high pressure side is on the outside of the MH which makes me much happier.

4 angle brackets hold it down and make for easy removal.

The remaining hole is for the fridge ventilation.

Saturday, 24 April 2010

Gas System Installed

The gas system on my MH is supplied by an external tank that I fitted in the previous post.  I want to do it this way for the following reasons.  I didn't want to have bottles that needed changing as this takes up valuable room, if using it abroad the bottles are a bit different and the regs definitely are, filling from a petrol station is considerably cheaper.
I looked at different systems but in the end after discussing my needs with a LPG conversion supplier I decided that a tank and take of for an LPG conversion would do the job with a bit of modification.

On a LPG conversion the LPG is delivered as a liquid to the engine where it is dealt with to burn in the cylinders.  In a normal Calor bottle in a domestic situation the LPG is taken off the top of the tank as a vapor.

The take off in the car system has a tube which goes into the bottom of the tank to get liquid.  The modification was simply to cut this tube seal it of and drill a small hole at the top of the tube so the vapor is taken off not liquid.  I was also advised to bend the float stem down a bit so the cut of for the fill is less than 80%.


Next came the plumbing.  At the moment it is all inside the MH which is great for access but of course if the was a leak this has the potential to get in to the MH, although it is heavier than air and their is plenty of ventilation for it to drop out.  At this point there is about 6 bar (90psi) I am told.

You can see some bubbles from the only small leak I had
on the whole gas system.  This was because I had been
mindful of not over tightening the fitting. 
A quick nip up sorted that out

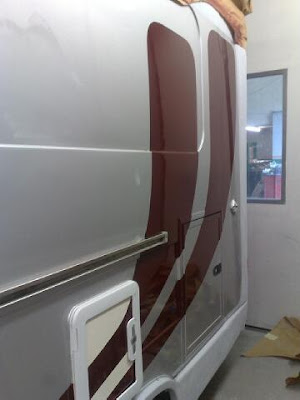
I will make a removable cover to make all this external, separating it from the living space.  At the top of the picture you can see the back of the filler.

The outside and behind the two screws is an external regulator.
That delivers the gas at 30mb to the appliances

The last appliance to be fitted was the Carver heater.


With the small fan I fitted behind this is really kicking out some serious heat.

Please note.  This is not intended to be a tutorial to on how to do what I have done.  I do not encourage you to mess with gas!


Thursday, 22 April 2010

Spent The Day On My Back

The one thing I hate more than working on my back is working on my back under a vehicle.  So today has not been my favorite especially as cutting with a 9" angle grinder was involved.  Always a treat under a vehicle!

The task was the fitting of the external domestic gas tank.

The bit of gas pipe is for test purpose only!
The legal third strap will be fitted later

The manifold is accessed through the floor inside the MH. 

This will be enclosed from the inside when I have done all the connections and tested it, this will make it external as it should be.

Wednesday, 21 April 2010

It's Been A Busy Few Days Again.

I wanted a float to better show the water level in my tanks.  After a post on a forum a member came up with an ear plug.  Its perfect and I have plenty of them.  

I decided on unused!

I finished the wiring and tidied it all up and labeled it ready for connection to the fuse panel.

Yesterday I glued the support battens in ready to take the roof panel today.  This is what it looked like this morning.

 Tidy!  NOT

At the end of the day things looked considerably different.

  
While the adhesive was going off I wired up the fuse panel.

Last job of the day was putting in the lights for the main area.

The light on the right is door entry operated

On a side note the windows for the boat project  arrived today.


There will be 8 of these and 3 x 18" portholes.